Zlib Windows builds start from the same C source code used on every other platform, compiled with Microsoft Visual C++ through CMake or the makefiles in the win32 folder. The process takes a few minutes and produces static and shared libraries that any Windows C or C++ project can link.
What You Need Before Starting
zlib has no external dependencies, so the toolchain list is short. Visual Studio with the Desktop development with C++ workload provides the compiler, linker and a Developer PowerShell or command prompt where those tools are already on the path.
- Visual Studio or the Build Tools for Visual Studio, with the C++ workload installed.
- CMake, version 3.15 or newer as stated in README-cmake.md.
- The zlib source archive, extracted to a folder such as
C:\src\zlib-develop. - Optional: Git, if you prefer cloning the repository over the ZIP download.
Visual Studio already bundles a CMake version, so a separate install is often unnecessary. Running cmake --version inside the Developer PowerShell confirms which version is active before you begin.
Getting the Source onto Your Machine
Use the download section to fetch develop.zip, then right-click the file and extract it. The folder that appears holds CMakeLists.txt, zlib.h and the win32 directory, which confirms you are in the right place.
Developers who want a fixed release can clone the repository and check out a tag instead. The zlib GitHub guide explains the branches and tags, and why pinning a tag keeps builds repeatable.
Building with CMake and Visual Studio
CMake is the most flexible route on Windows. It generates a Visual Studio solution, builds Debug or Release configurations, runs tests and installs headers and libraries into a folder of your choice, all from a handful of commands.
Configure the Project
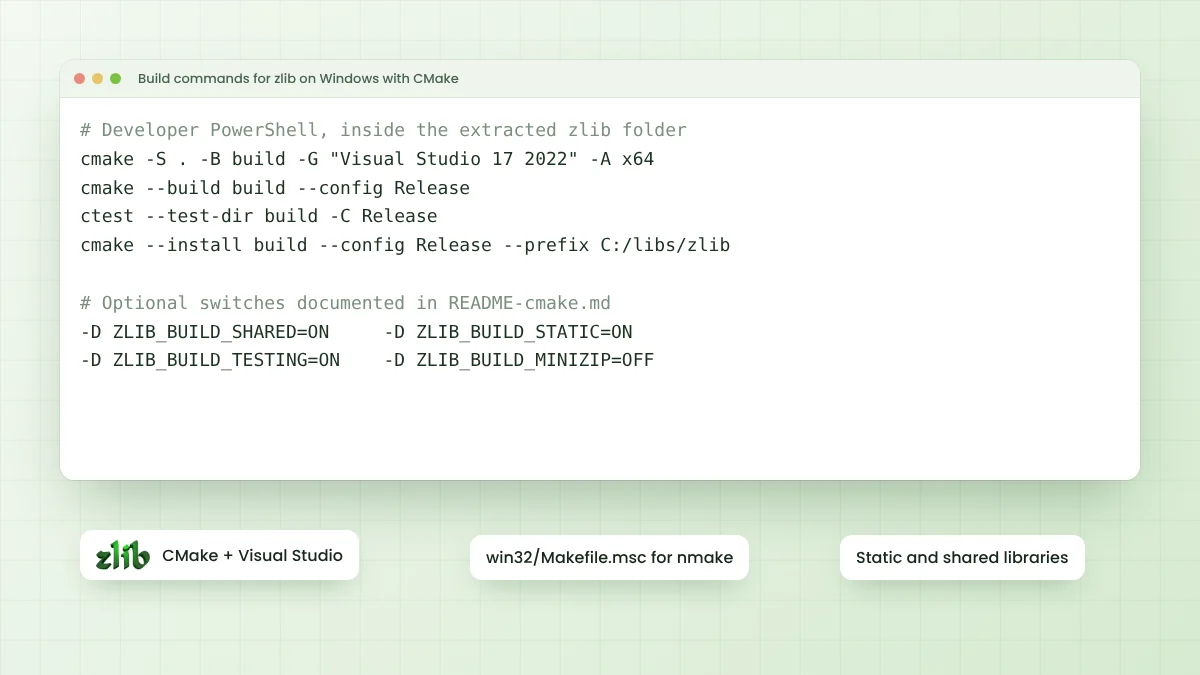
Open the Developer PowerShell, move into the extracted folder and run the configure step. The generator name below targets Visual Studio 2022, and -A x64 selects a 64-bit build. Use -A Win32 for a 32-bit library.
cd C:\src\zlib-develop
cmake -S . -B build -G "Visual Studio 17 2022" -A x64
Compile and Test
Multi-configuration generators such as Visual Studio choose Debug or Release at build time, so pass --config to both the build and test commands. A successful run ends with a report that every test passed.
cmake --build build --config Release
ctest --test-dir build -C Release
Install to a Known Folder
Installing copies zlib.h, zconf.h, the libraries and CMake package files into one prefix. Choosing a folder you own, rather than Program Files, avoids permission prompts and keeps several versions side by side.
cmake --install build --config Release --prefix C:/libs/zlib
Useful CMake Options
README-cmake.md lists the switches that change what gets built. Each one is passed during configuration with -D, for example -D ZLIB_BUILD_MINIZIP=OFF. Defaults shown below come from that file.
| Option | Default | Effect |
|---|---|---|
| ZLIB_BUILD_SHARED | ON | Builds the shared library (DLL) |
| ZLIB_BUILD_STATIC | ON | Builds the static library |
| ZLIB_BUILD_TESTING | ON | Builds example programs as tests |
| ZLIB_BUILD_MINIZIP | ON | Builds the contributed minizip library |
| ZLIB_INSTALL | ON | Enables the install step |
The minizip option has its own extra requirements, including bzip2 support by default. Turning it off is the quickest fix when configuration stops with a missing bzip2 error and you only need the core library.
Building with nmake and Makefile.msc
The win32 folder keeps a classic makefile for Microsoft's nmake tool. It suits quick command-line builds and older scripts. Run it from the top of the source tree inside a Developer Command Prompt, exactly as the comment at the top of the file describes.
nmake -f win32/Makefile.msc
The same folder holds Makefile.gcc for MinGW, Makefile.bor for Borland tools, zlib.def for DLL exports and DLL_FAQ.txt. That FAQ explains naming and calling-convention questions that come up when sharing a zlib DLL between programs.
Linking zlib into Your Windows Project
Projects that use CMake can find an installed copy with find_package and link the imported target. Point CMake at the install prefix through CMAKE_PREFIX_PATH so it knows where to look.
find_package(ZLIB CONFIG REQUIRED)
target_link_libraries(myapp PRIVATE ZLIB::ZLIB)
Visual Studio projects without CMake need three settings: the include folder in Additional Include Directories, the library folder in Additional Library Directories, and the .lib file name in Additional Dependencies. Library names changed on MSVC in 1.4, so copy the exact name from your build output.
Choosing Between DLL and Static Builds
| Build type | Advantages | Points to watch |
|---|---|---|
| Static library | Single executable, no DLL to ship | Rebuild your app to pick up zlib fixes |
| Shared library (DLL) | One copy updated in place | The DLL must travel with your program |
Mixing runtime libraries is a common source of linker warnings. Keep the C runtime setting, such as /MD or /MT, the same in zlib and in your application, and match Debug with Debug and Release with Release.
Common Windows Build Problems
- cl is not recognized: open the Developer PowerShell or Developer Command Prompt instead of a plain terminal.
- Generator not found: match the
-Gname to your installed Visual Studio version, or omit it to let CMake choose. - Unresolved external symbols: check that the 32-bit or 64-bit choice matches your project and the library is listed for linking.
- zlib.h not found: add both the source folder and the build folder, which holds the generated zconf.h, to the include path.
Runtime return codes such as Z_DATA_ERROR are a separate topic from build issues. The zlib error codes guide explains each value and the usual fix.
Checking the Finished Build
After installation, the prefix folder should contain an include directory with zlib.h and zconf.h, a lib directory with the import and static libraries, and a bin directory holding the DLL when shared builds are enabled. CMake package files sit under lib as well.
A quick test program that prints zlibVersion() confirms everything links and loads correctly. If it prints the version shown in ChangeLog, the headers, library and runtime DLL all come from the same build.
Other Windows Toolchains
MinGW-w64 and MSYS2 users can build with CMake using a MinGW Makefiles or Ninja generator, or with win32/Makefile.gcc. The repository's automated checks include MSYS and Cygwin workflows, which helps keep those environments working.
Conclusion
Zlib Windows builds come down to three CMake commands for configuring, building and testing, plus an optional install step into a folder you control. The nmake makefile in win32 remains a quick alternative for simple command-line builds.
Match the architecture, configuration and runtime settings between zlib and your own project, and linking works without surprises. Rerun the tests whenever you update the source to keep every build trustworthy.